
What Is Die Cutting in Packaging? A Buyer’s Guide to Sample Approval
Die cutting turns a flat packaging sheet into the cuts, folds, openings, and tabs that make a box work. For a buyer, the important question is not simply whether a supplier can cut the shape. It is whether the approved sample opens, closes, protects, prints, and packs the way the finished order needs to. This guide explains what to check before approving production.
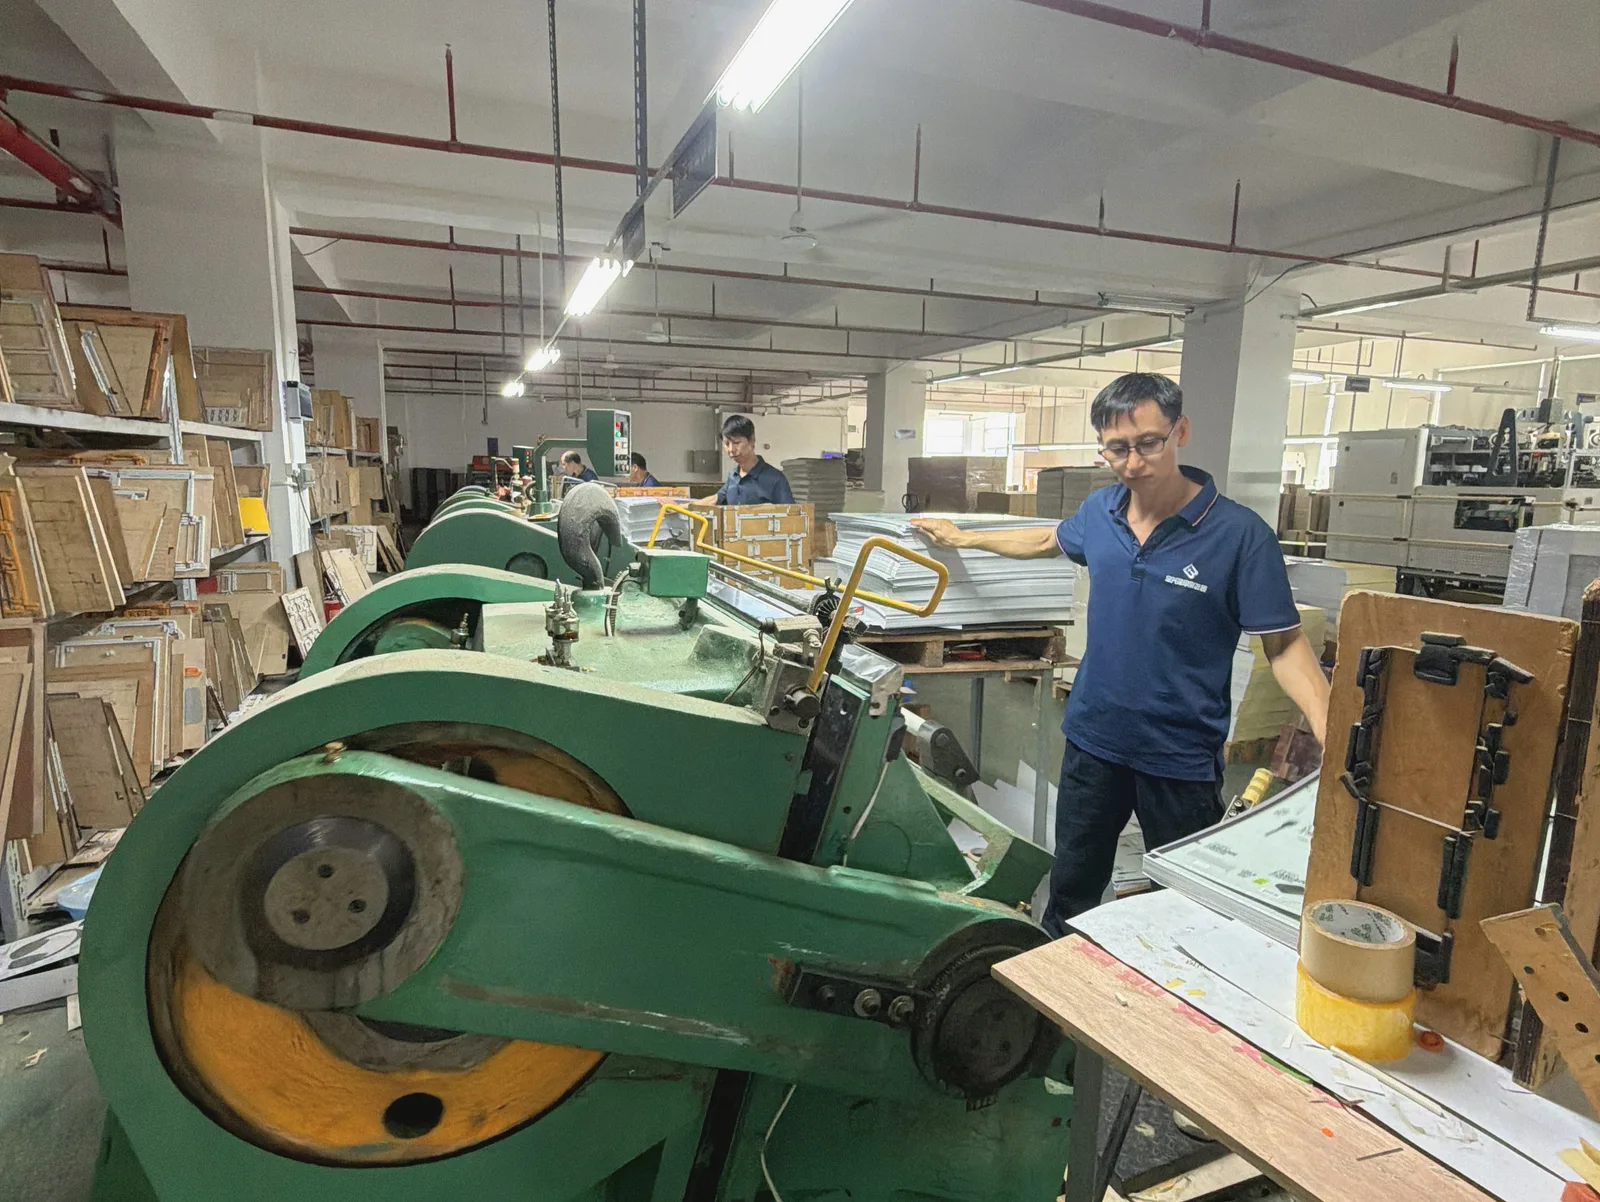
A box can look convincing in a digital mockup and still fail when made from real board. A lid may catch on an insert. A mailer flap may resist closure. A window may leave too little material around a hanging hole. Artwork may cross a fold in a way that makes the brand name hard to read. These are not separate “design problems” and “factory problems.” They are connected decisions about structure, material, print placement, and the cut-and-crease pattern.
Brand owners, importers, packaging buyers, and product teams can use the checks below to judge a proposed box and the evidence behind a sample. Agree the exact tolerances, tooling, materials, and production sequence for the specific order with the manufacturer; an attractive prototype does not settle those details.
What die cutting does—and what it does not do
In packaging, die cutting uses a designed cutting form to create a specified shape in board or paper. Depending on the design, the process may also create crease lines that guide folds. The European Federation of Corrugated Board Manufacturers (FEFCO) describes die cutting as part of converting a flat board sheet into packaging, alongside printing, folding, and gluing. That sequence matters because a correct cut does not, by itself, guarantee a correct printed or assembled box.
The word “die” refers to the cutting form used for a production run. A digital cutter can make a prototype or sample without that production die. Both can create a physical shape, but they answer different questions. A digitally cut sample can reveal whether the overall structure makes sense. It may not reproduce every result of the planned production method, material batch, printing, surface finish, or assembly sequence. Ask which parts of the sample represent the intended production specification and which are only provisional.
Die cutting is also not the same as printing. Printing places graphics on the sheet; cutting and creasing define its edges and folds. Nor does the process automatically select a suitable board. The same outline cut into two materials can behave differently when folded, opened, stacked, or loaded. The buyer’s approval therefore needs to cover the assembled structure, not only a flat drawing.
| Feature | What the drawing or tool defines | What a buyer should inspect on a sample |
|---|---|---|
| Cut line | The outer edge or an internal cutout | Clean edges, complete separation, and whether the finished shape fits the product |
| Crease or score | The intended fold location | Ease and direction of folding, alignment after assembly, and any visible cracking |
| Perforation | A controlled tear or opening feature | Whether the opening works without accidental tearing in handling |
| Slot or tab | A joining or locking feature | Whether parts engage securely without excessive force or damage |
| Window or hanging opening | A display or access feature | Visibility, edge quality, product retention, and surrounding board strength |
| Glue area | A region intended for joining | Whether the assembled seam stays where expected and avoids important graphics |
The table is a review aid, not a promise that every design uses all of these features. A simple folding carton may need a different approval checklist from a heavy presentation box or an e-commerce mailer. Start with the package’s actual job.
Start with the buyer’s job, not the cutting method
The quickest way to order the wrong structure is to specify a box style before explaining how it will be used. A retail carton needs to show the product and survive handling on a shelf. A mailer must close and protect its contents during shipment. A gift box may prioritize presentation, repeated opening, and a close-fitting insert. These needs influence where folds, openings, tabs, and cutouts belong.
Write a one-sentence use case before discussing artwork: “The box will hold a glass skincare bottle, be packed by hand, and ship inside an outer carton,” or “The pack will hang on a retail peg and allow the product to be seen through a window.” A brief like that changes the questions a structural designer should ask. What must stay visible? What must stay restrained? Which edge faces a customer? How will the pack be filled? Will it be opened once or repeatedly?
The intended product must be measured as it will actually be packed. An empty sample bottle can differ from the filled product. A cable, cap, instruction card, protective sleeve, or insert can change the required space and the way the product sits. Provide the complete packing set, or at least a clear list of components and their maximum dimensions. Our separate guide on how to measure a box and read a dieline explains the dimension discussion in detail. Here, the key point is that a die-cut outline cannot compensate for an inaccurate product brief.
Before asking for a quote, decide which failure would matter most to your customer: a damaged product, an awkward opening, slow packing, weak shelf presentation, excessive shipping space, or a visible mismatch between design and finished box. Rank those concerns. A supplier can then propose a structure and sample review around the priority rather than treating all preferences as equal.
Match the structure to the use case
For a folding carton, ask how the blank folds into its final shape, where it is glued or locked, and how the product is inserted. For a corrugated mailer, examine the closure sequence, internal space, and whether the packed product can move. For a window or hanger box, inspect the cutout and hanging feature as working parts, not decoration.
The buyer does not need to design the cutting tool. The buyer does need to explain the desired opening, product orientation, packing method, display method, and transport conditions. A reference photo is useful for direction, but it is not a complete specification. Two boxes that look similar from the front may have different bottom locks, seams, inserts, or closure behavior.
What the dieline is supposed to communicate
A dieline is a flat drawing that maps the package before it is folded. It tells the design and production teams where cuts, creases, flaps, tabs, and print areas are intended to go. It is a shared technical reference, not a guarantee that a package will work. The physical sample tests whether the proposed drawing behaves as intended with the selected material and product.
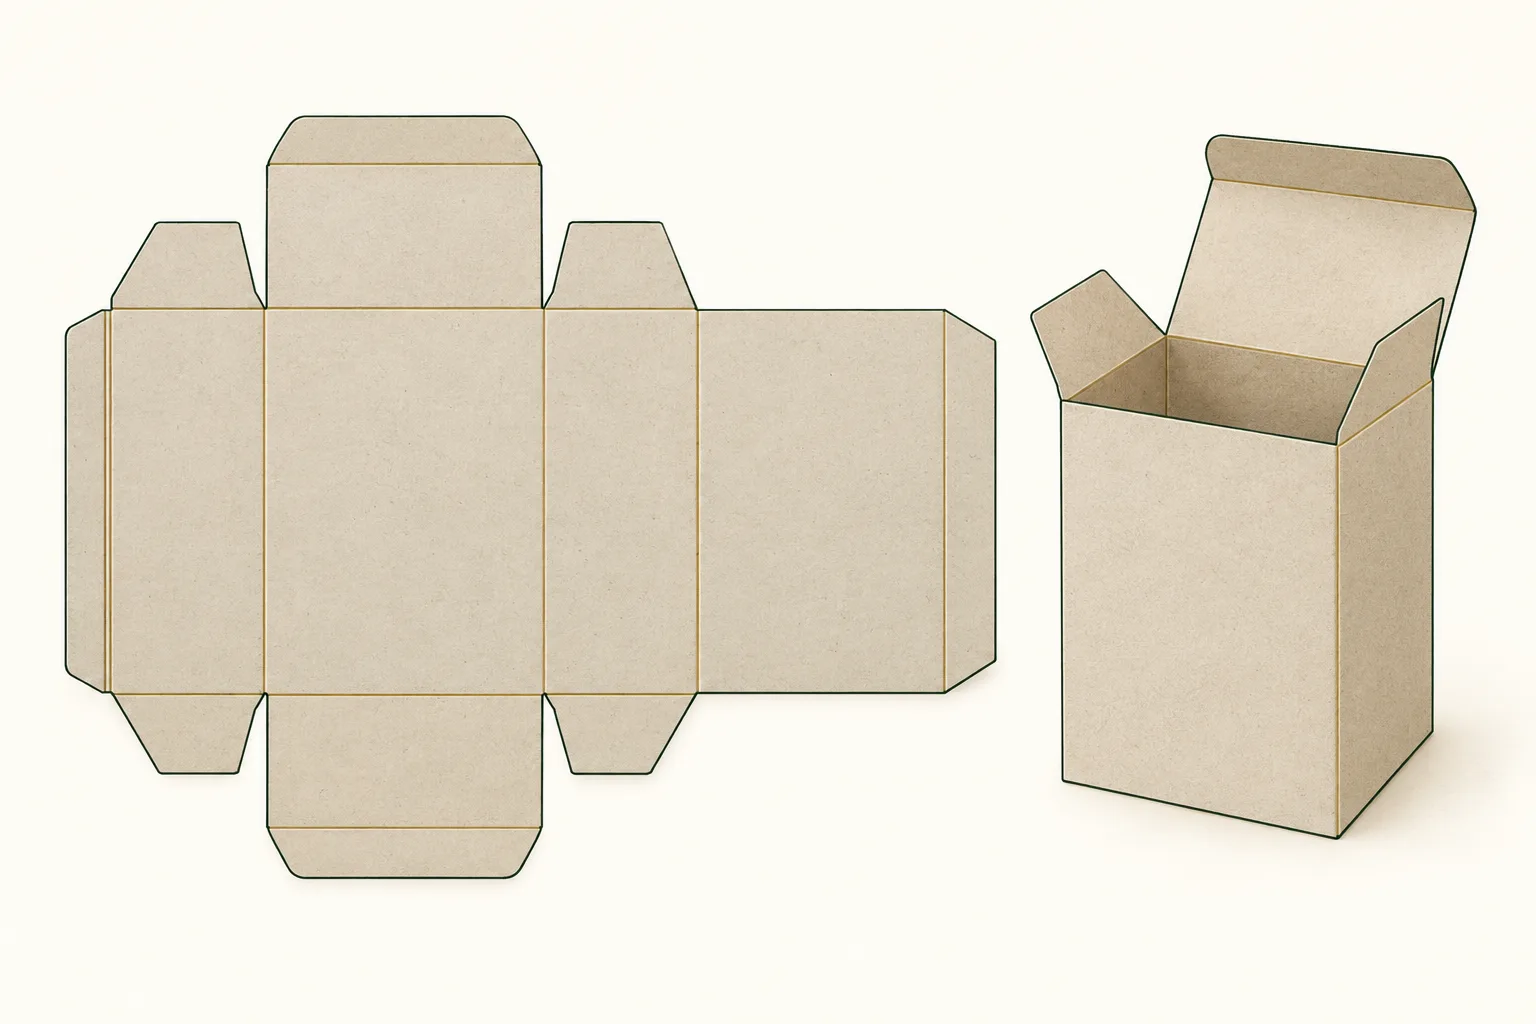
Keep structural lines separate from printable artwork in the working file. A cut line should not be confused with a decorative stroke, and a fold line should not be treated as a visible graphic. Packaging prepress also needs to consider how artwork aligns with the structure. Esko’s overview of packaging prepress identifies dieline alignment and file checks as part of preparing artwork for production. The exact file format and layer naming conventions should be agreed with the supplier rather than assumed from another printer’s template.
Look at the dieline in two ways. First, read it as a flat sheet: which panels are connected, which areas will be cut away, and where are the joining surfaces? Second, imagine the assembly sequence: which panel folds first, what covers it, and what remains visible when the box is closed? If you cannot follow the sequence, ask for an assembled sample or a short assembly demonstration. Approving an unfamiliar flat file without seeing its physical outcome leaves too much to interpretation.
Artwork crossing a fold deserves special attention. Text close to a crease can become harder to read after folding; a foil or embossing feature may interact with the structure differently from flat print. A window cutout changes the printable area around it. These are reasons to review artwork and structure together. The relevant options are explained on our materials and finishes page, but a sample should confirm the chosen combination for the actual design.
Check for conflicting or incomplete lines before the sample is made. A disconnected cut path, doubled line, or ambiguous corner can produce a result different from what the designer expected. Esko’s guidance on checking a die drawing specifically calls attention to gaps and doubled lines. The buyer may not be the person repairing the file, but can require a clear version and confirmation that the structural drawing used for sampling is the one being approved.
What changes when the material changes
The cutting shape and the material work together. A fold in a thin paperboard carton is not the same as a fold in corrugated board, and neither behaves like a rigid box built from wrapped board components. Grain direction, board construction, coating, and surface finish can influence folding and the appearance of a crease. Do not approve the look of one material and assume a different material will produce the same result.
When comparing samples, ask whether the sample uses the proposed production material or a substitute. If it is a substitute, write down what remains untested. The substitute may be enough to check overall fit but insufficient to approve final stiffness, appearance, or fold behavior. This is not a reason to reject every early prototype. It is a reason to label each prototype according to what it actually proves.
The concern is particularly clear with a display window or hang tab. The amount of material left around an opening affects how the pack handles and presents the product. A cutout that looks elegant in a rendering can weaken a narrow bridge of board or leave a rough-looking edge. The correct remedy might be a different opening position, shape, material, reinforcement, or display method. None of those choices should be made from a universal dimension copied from another supplier’s guide.
Similarly, an insert changes more than the appearance of the interior. It can determine where the product rests, how a lid closes, whether a flap meets its locking slot, and how the package behaves when tilted. Bring the insert into the structural sample review. If it will be made from a different material or supplied by a different party, confirm the interface between parts before approving the box.
Ask what the first sample actually represents
“Can you send a sample?” is an incomplete procurement question. A structural prototype, a printed proof, a finished pre-production sample, and a retained production reference can serve different purposes. The name a supplier uses is less important than a written explanation of what is included.
Ask these questions before deciding whether a sample is ready for sign-off:
- Is this made to the proposed final internal and external dimensions?
- Does it use the intended board or a substitute?
- Are the cut and crease positions based on the current dieline revision?
- Is the artwork present, and if so, is the printing method representative?
- Are coatings, foil, embossing, windows, magnets, inserts, handles, or other requested features included?
- Is the sample assembled by the intended method?
- Which parts of the finished order will look or behave differently?
Record the answers with a dated sample identifier or file revision. That record prevents a common misunderstanding: one person approves the shape, while another assumes the approval includes color, finish, or material. The point is not bureaucracy for its own sake. It is to make sure a small decision in sampling does not silently become a large decision in bulk production.
If you are ordering through an OEM packaging process, agree who owns each approval. A product engineer may approve fit, a brand team may approve artwork, and a purchasing manager may approve price and quantity. One signature cannot stand in for all three unless the organization has explicitly given that person authority.
Sample stages and the questions they answer
| Sample or proof | Useful for answering | Usually insufficient on its own for |
|---|---|---|
| Digital structure view | Panel layout, assembly concept, early discussion | Physical product fit, fold feel, material behavior |
| Unprinted physical prototype | Basic fit, opening sequence, closure, packing method | Final print color, finish, and full production appearance |
| Printed proof or mockup | Artwork placement and visual review | Structural performance if made from another material or method |
| More representative finished sample | Combined appearance and handling review | Every future production outcome without a defined specification and checks |
These are review categories, not guaranteed stages or services offered for every order. Ask the supplier which type is available for your project, what it costs, and how it relates to the production plan.
Inspect the sample as a user would handle it
Do not inspect a sample only on a table under good light. Put the real product inside. Close the package the way packing staff will close it. Open it the way a customer will open it. If the item will travel, assess the assembled pack and its intended outer shipping configuration. A sample that appears neat when empty may behave differently after packing.
Begin with fit. Does the product slide in without forcing it? Does it move more than intended? Are accessories, leaflets, sleeves, and inserts included? Is there enough access for packing staff to position the item consistently? An overly tight fit can slow assembly or stress a flap; an overly loose fit can undermine protection and presentation.
Next, inspect the folds and closure. Are the crease locations where the assembly needs them? Does the box close without a panel buckling, a tab tearing, or a lid sitting unevenly? Can a person open it without destroying the structure, if reuse is part of the brief? Watch the sequence rather than only the final pose. A pack that looks acceptable after careful adjustment may still be impractical for routine packing.
Then look at cut quality and appearance. Are edges consistent with the intended finish? Are corners clean? Are windows and slots in the right place relative to the product and artwork? Does a hang feature work in the intended orientation? If the packaging has printed graphics, look at their position after folding. A perfectly centered graphic on a flat sheet may not feel centered on the assembled box.
Finally, ask whether the sample answers the highest-risk question from the original brief. If the concern is protection, a beautiful presentation photo is not proof. If the concern is retail visibility, a closed sample does not show how the product looks through the window. If the concern is packing speed, have the person who will pack the box try it. A useful sample review is a test of the buying decision, not just an aesthetic vote.
A practical sample-approval checklist
- Product fit: Confirm the complete packed product, not a substitute object, sits as intended.
- Opening and closing: Check the sequence, force, alignment, and repeated handling if relevant.
- Structural features: Inspect tabs, slots, bottom locks, windows, flaps, and inserts that the design actually uses.
- Cut and crease: Look for incomplete cuts, awkward folds, damage at creases, or exposed rough edges.
- Artwork placement: Check visible panels, fold crossings, window borders, and any text near the trim.
- Materials and finishes: Confirm whether the sample uses the specified material and decorative processes.
- Packing and transport: Review how the box is filled, protected in an outer carton, and handled in its actual route.
- Version record: Match the sample to the approved drawing, artwork, and written specification.
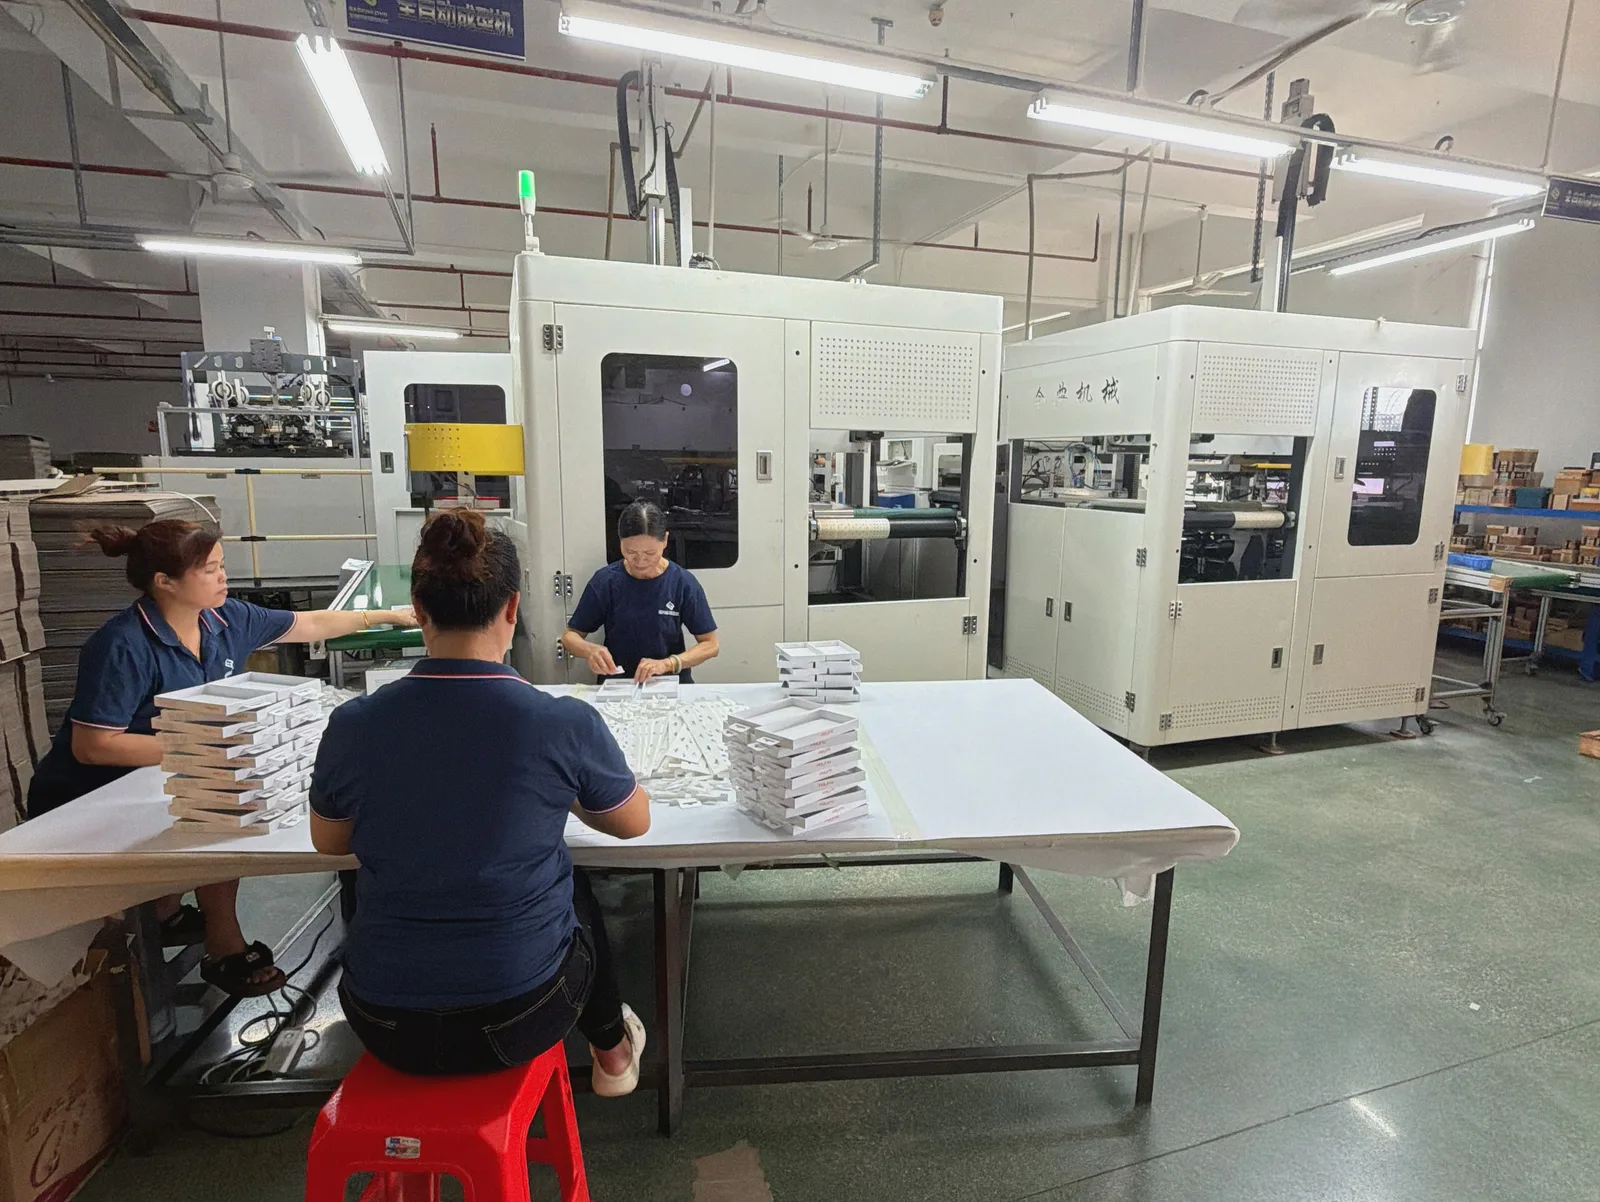
Write down both “pass” and “change” observations. “Looks good” is too vague to resolve a later dispute. “The top flap closes without catching the insert, with the product and leaflet inside” is a checkable statement. If something needs revision, identify the location, the expected result, and the evidence that will show the revision worked.
Recognize problems before bulk production
Some problems are easy to miss because they do not show in the most flattering product photo. A flap may be hidden under the box. A crease may crack only when folded in the intended direction. A window may be slightly misaligned with the actual product. A carton may need hand pressure at one corner to close. These small observations deserve attention before they are repeated across an order.
If a tab tears, do not simply ask the supplier to “make the box stronger.” Ask where the tear starts, what action causes it, and whether the problem is linked to the tab shape, material, crease, insertion method, or surrounding cut. If a product rattles, ask whether the dimensions, insert, or packing configuration is responsible. If graphics miss an edge, compare the printed sample with the approved artwork and dieline revision. Diagnosing the interface is more useful than attaching a vague quality label.
Treat a changed material or finish as a new approval question. If the team approves an uncoated structural sample and later adds lamination, foil, or a different board, at least some appearance or handling assumptions may need rechecking. That does not mean restarting the entire project. It means naming what changed and deciding which checks must be repeated.
Ask for a clear response to every issue: what will change, which file or specification will change, and what evidence will be provided before production. The quality-control process is relevant to production checks, but a buyer still needs project-specific acceptance points. A general quality statement cannot replace approval of the actual sample.
Approve the right version—not just a photograph
Packaging projects collect many almost-identical files: artwork with a small text correction, a structural drawing with a revised flap, a color proof, a photo of the first sample, and perhaps another photo after an insert change. Without version control, an approval can attach to the wrong artifact.
Keep one concise approval record that identifies the final structure drawing, artwork file, material specification, finishing choices, insert or accessory specification, approved physical sample, and open exceptions. The person sending the approval should state which items are approved and which are still pending. A photo is useful evidence of appearance, but it may not reveal internal dimensions, material identity, or a hidden construction change.
For a project with several reviewers, assign each person a decision area. Marketing can approve visible design; product staff can approve fit and usability; procurement can confirm the commercial specification; operations can review how the pack is assembled. The manufacturer needs a single reconciled instruction, not four conflicting emails. If reviewers disagree, resolve the conflict before releasing production files.
If a change follows approval, do not assume it is “too small to matter.” Changing an artwork panel might affect a window border. Changing an insert might affect closure. Changing a board might affect the fold. Ask the supplier whether the proposed change touches the dieline or the signed-off sample, and document the answer. The goal is not to freeze every detail too early; it is to prevent an unexamined change from inheriting an approval it never received.
What to send in an approval email
An effective approval message can be short. Identify the product reference, the approved sample or drawing revision, the date, and the scope of approval. List outstanding corrections separately. For example, “Structure and product fit approved based on sample revision B; printed color and foil placement remain pending the next proof.” That wording is an example of a clear decision boundary, not a template that substitutes for your project’s actual checks.
Attach or link the exact files you are approving. Do not rely on “the latest version” as a file name. If an issue has been corrected, reference the revised evidence rather than approving based only on an assurance that it will be fixed. For orders with multiple variants, confirm which variants share the same structure and which need individual review.
Ask the supplier questions that change the buying decision
A buyer does not gain much from asking, “Do you do die cutting?” The better questions expose the decisions and risks in the proposed package. What is the intended construction? Which features require a physical sample? How is the product held? What does the sample prove? Which changes after approval would require another review?
Before the quote, provide the real product dimensions, packed weight if relevant, reference images, intended use, desired print and finish direction, target order quantity, and destination. If the product is fragile, irregular, or display-sensitive, send a physical example when practical. Explain whether the package needs to ship as the outer box or will sit inside another carton. These inputs help the supplier distinguish a cosmetic preference from a structural requirement.
During structural review, ask for a dieline or equivalent drawing showing the proposed cuts and folds. Request an assembled sample where the shape is unfamiliar. Ask which material is used in the sample, whether a production die will be required, and what would change if the design is revised. The answer may affect both the approval sequence and the commercial decision; do not assume a prototype route and a production route are identical.
Before the bulk run, ask what document and sample will serve as the production reference. Who confirms that printing and die cutting align? How will the team check openings, closure, and assembly? What will happen if the first produced pieces differ from the approved sample? A supplier should be able to discuss these checkpoints for your order without inventing universal guarantees or replacing details with broad promises.
If the buyer cannot answer every question yet, send what is known and identify what is open. A useful inquiry is not necessarily complete on day one. It is transparent enough for a supplier to propose the next decision. You can send your project requirements with the product, packaging use case, reference structure, and any existing artwork or dieline.
Common mistakes that create avoidable sample revisions
Approving an empty box without the product. A structure can fold and close correctly in isolation while failing after the product, insert, leaflet, or accessory is added. Test the actual packing set.
Treating a rendering as a physical approval. A rendering can help choose a direction, but it does not establish fold behavior, material feel, or practical assembly. Use a physical sample for physical questions.
Sending artwork before the structure is stable. If panel sizes or fold positions change, carefully placed graphics may move with them. Keep artwork aligned to the current dieline and recheck affected areas after revisions.
Assuming the prototype is production-identical. Ask which features are representative and which differ. A sample can be useful without being a final production reference, provided everyone knows its limits.
Focusing only on the front panel. The bottom, side seam, opening flap, insert, and shipping orientation can determine whether the pack works in use. Review the entire path from filling to opening.
Approving a vague “similar material.” A structural demonstration in a substitute board may answer a fit question but not a final material or finish question. Record the substitution and request a later check if it matters.
Losing track of revisions. A corrected artwork file does not automatically correct a sample made from an earlier dieline. Tie each approval to specific file and sample revisions.
Confusing a generic quality claim with a project acceptance test. Ask what will be checked on your box and against which approved reference. “Quality control” is a process label; your approval record should identify observable outcomes.
These mistakes share a cause: the team approves a partial representation as if it were the complete product. A better process asks one question at each stage and records the answer. Is the structure right? Does the real product fit? Does the print align? Does the finished sample represent the order? Only then is the production instruction clear enough to hand off.
Frequently asked questions
Is die cutting the same as a dieline?
No. A dieline is the drawing that specifies the proposed cut and fold positions. Die cutting is a manufacturing process that uses a cutting form to create the specified shape. A digital cutter may also be used for a prototype. Review the drawing and the physical result together.
Does every custom box need a new cutting die?
Not necessarily. The answer depends on the structure, size, existing tooling, proposed production method, and whether a previous tool can be used without compromising the specification. Ask the supplier to explain what tooling the quoted design requires and what happens if the structure changes.
Can I approve a digitally cut sample for bulk production?
You can approve the aspects it actually represents, such as basic geometry and product fit, if the material and assembly are appropriate for that check. Do not assume it also proves the final printing, finish, or production-cut result. Ask what further proof is needed before bulk production.
What should I inspect first on a die-cut packaging sample?
Put the complete product and accessories inside, then test the opening, closing, folds, tabs, slots, and any insert. Check that printed graphics align with the assembled shape. Prioritize the features most likely to affect protection, packing, display, or customer use.
Why does the same dieline behave differently in another material?
Materials can differ in construction, stiffness, surface, and fold behavior. A shape that works in a substitute sample may need another review in the specified material. Treat a material change as a change to the approval evidence, not merely a new color choice.
What happens if artwork moves after the structure is approved?
Check whether the moved artwork crosses a fold, sits near a cut, affects a window or tab, or changes the visible balance of an assembled panel. Update the approved artwork revision and request a new proof or sample for affected areas when needed.
Should a buyer specify a numerical cutting tolerance?
Only if the number is relevant to the product and has been agreed with the supplier for the chosen material and method. A tolerance copied from a general article or another factory is not a valid acceptance criterion for this order. Describe the functional fit and ask how it will be measured.
Is a sample photo enough to approve production?
A photo helps document visible appearance, but it may hide dimensions, board identity, opening force, internal fit, or an earlier file revision. Link the approval to the physical sample and written specification, and make any limitations explicit.
What information should I send to request a die-cut box quote?
Send the packed product dimensions, intended use, approximate quantity, reference structure, artwork or brand direction, preferred material and finish if known, packing method, and destination. Identify which details are confirmed and which need the supplier’s recommendation. For a more detailed dimension checklist, read how to measure a box for a custom order.
The decision to make before you approve
Die cutting is valuable because it can turn a planned shape into a repeatable physical package. But the buying decision is broader than the cutting operation. Approve the structure that works with the real product, the agreed material, the intended artwork, and the way the package will be packed and used. Keep the approved files and sample connected. That is how a sample becomes a useful production reference rather than a reassuring photograph.
For a custom project, describe the product and the failure you most need to prevent. Then ask for a sample that tests that risk. When the sample passes, record exactly what passed and what remains open. That gives your team and the manufacturer a practical basis for the next step.